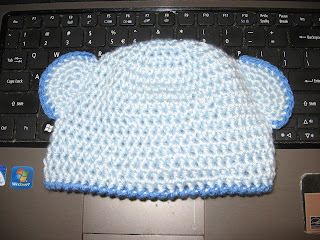
Crochet Chemo Sleep Cap Pattern
This pattern is by no means an
original. Many different parts were
pulled from other hats. I wanted to
create a sleep hat that had no seams and no knots to irritate the skin while lying down. I needed a hat that fit snug, and kept the head warm all night. I found a few knit patterns that filled all the requirements, I did not find a crochet pattern that met all these needs. So I wrote this basic outline. This pattern was created on Ravelry just so
that I could duplicate it easily in my projects. I had to have a place to host my pattern, so
this blog it is! This pattern was
written as a reference to myself, so if you happen to stumble across it and
have questions, don’t hesitate to email me: skattersATgmail or you can leave a comment
here too.
Yarns I have used:
I Love This Cotton, Caron Simply Soft (remember to use VERY soft yarn for chemo caps and most people don't like wool.)
Hook: 5.0
mm “H” hook
Pattern Notes: Hat is worked in a spiral.
Do not join rounds. You can work in all dcs (as written) or hdcs (just
substitute hdc for all dcs in pattern) for a tighter stitch. Just use one
stitch consistently. This pattern was originally created for an adult
female. I prefer to keep my hats just a
bit on the small size, since you have to account for the lack of hair. I will eventually
use this pattern to create sleep caps for men too, making them a bit larger and
leaving off the shell border.
CROWN OF HAT
Rnd 1:
magic circle, 11 dcs in circle, pull circle tight. Do not join here, or
any rnd following (11 dcs)
Rnd 2:
2 dcs in each st around. Use stitch marker in first stitch, move up to
first stitch at the beginning of each rnd to keep track of where to begin/end
each rnd (22 dcs)
Rnd 3:
*2 dcs in first st, 1dc in next st* repeat * around to end of rnd (33 dcs)
Rnd 4:
*2 dcs in first st, dc in next 2 sts* repeat * around to end of row (44 dcs)
Rnd 5: *2 dcs in first st, dc in next 3 sts* repeat * around to end of
rnd (55 dcs)
Rnd 6: *2 dcs in first st, dc in next 4 sts* repeat * around to end of rnd (66 dcs)
Continue rounds in this way, adding
one more stitch in each of the “dc in the next
__ sts” until the hat has a diameter of approximately 6 - 6.5” for adult
female hat or 7 - 7.5" for an adult male hat. (See HERE for more information about sizing hats.) I measure diameter from edge
to edge of the circle, going across the middle hole. Feel free to change this diameter, based on whose
hat you are making.
BODY OF HAT
Rnd 1:
dc in ea st around
Repeat Rnd 1 until hat measures approximately
7“. (lay the hat flat, and measure from
the tippy top of the crown (where the magic circle hole is) down the front of
the cap, to the bottom of your last rnd.)
Once again, these measurements are a starting point, adjust as you need.
You may want to try on the hat at this time to determine whether you want more
rows or not.
BORDER
For a male hat, I just work 2 -4 rows of single crochet. A reverse single crochet looks nice, but I have heard from multiple chemo patients that it pulls and binds.
For a male hat, I just work 2 -4 rows of single crochet. A reverse single crochet looks nice, but I have heard from multiple chemo patients that it pulls and binds.
For the female hats, I use a simple shell border. If you want a subtle shell, like the
one pictured on the two purple hats, use hdcs in your shells. If you want a more pronounced shell, like on the turquoise hat, use
dcs. (Directions given using hdcs.)
Rnd 1:
*sl st in next st. sk next st. 5 hdcs in next st. skip next st* repeat
around.
Depending on how many stitches you ended up with in the crown, the shells may not work out evenly. I just try to position my last 2 shells the best I can. That is considered the back of the hat, so I am not too worried about it.
Depending on how many stitches you ended up with in the crown, the shells may not work out evenly. I just try to position my last 2 shells the best I can. That is considered the back of the hat, so I am not too worried about it.
That’s it! Just weave in the ends and you’re done!


